Making Yogurt at Home
If, you’re not making your own yogurt at home . . . well, that’s okay. I make lots of stuff from scratch, but I’m not of the mindset that you’re really falling down on the job if you choose convenience over the extra time it takes to make stuff from scratch. We’re all trying to find a balance that works for ourselves and for our families. I think that balance is probably different places for different people.
I like to make stuff from scratch. Partly, because I just like to know that I can, and partly because I really do like knowing more about what’s in my food. It makes me better appreciate food in general, really. Anyway . . . if you’re at all interested, making yogurt from scratch is pretty easy. Seriously.
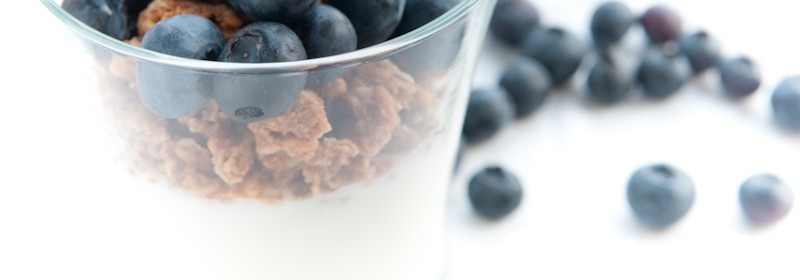
I like yogurt. I don’t eat it every day, generally, but I like a little yogurt and granola for breakfast every now and then. And I really like adding yogurt to smoothies, since it’s full of good probiotics. So, I consume a reasonable amount of yogurt on my own. One of my children . . . the one who would mostly prefer to eat bread and sugar . . . the one who really likes about 3 fruits and only a handful of vegetables . . . LOVES yogurt. LOVES it. Happily eats it most days for breakfast. Sometimes with granola; sometimes without. He’ll also eat several fruits and vegetables that he doesn’t really care for (Strawberries, Oranges, Bananas, Peaches, Spinach, Kale, etc.) if it’s in the form of a smoothie, so I make a lot of smoothies around here and I add yogurt (or the whey from making yogurt, see below) to many of them! I love knowing that by eating yogurt he’s getting some good protein and some great probiotics.
What I didn’t love about the yogurt from the store was:
1) So many of them had more than just milk and live cultures in them, and
2) The cost!
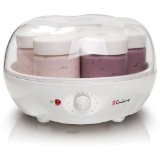
So, about 3 years ago, I started making my own. I really didn’t want to invest in a separate yogurt maker, although I know some folks who own them and love them. I’m sure the advantage of a yogurt maker is that you know exactly how it’s going to work, every time. If you’re not patient or willing to spend a few extra minutes monitoring the temperature of your milk, an automatic yogurt maker might be the way to go.
On the other hand, I think making homemade yogurt is REALLY easy! For the first year or so, I tried the “crock pot” method. That method works really well, but my crock pot tends to get too hot and scalds the top of the milk so that I end up with a film on my yogurt that I don’t care for (and makes cleaning my crock pot more difficult). Also, I didn’t love all the time that went into that process, even though it mostly didn’t involve a lot of work: heat milk in the crockpot for a couple of hours, come back and turn the crockpot off and let it cool for a few hours, come back and add your culture, wrap the whole crock pot in towels and let it sit for 8-12 hours. I wasn’t very good at “coming back” at the right times (I have other things to do!) and I didn’t love dragging out my big towels every time I wanted to make yogurt.
So, I’ve adapted my methodology to what works best for me. Maybe it will be helpful to you, too!
Homemade Yogurt
- Heat milk to 185 degrees*. You’ll need a thermometer to monitor this (mine looks like this one. Very inexpensive.). This kills the bad bacteria so it won’t compete with the good ones you’ll be adding. Essentially, this is pasteurization. This is where I use a double boiler, although you don’t have to have one (or like me, before I owned one, you can rig one up with a metal bowl or smaller pan and a larger pot. Use what you’ve got, right?). It’s a good idea to take your “starter”** out of the fridge while you’re doing this, so that it will warm up to room temperature and not cool the mixture down so much when you’re adding it.
- Cool the milk to 110 degrees (just let it cool at your leisure, put it in a cold water bath, or just whisk it to release the heat . . . whatever you’ve got the time and inclination to do).
- Whisk in the starter**.
- Put the mixture in oven-safe containers (I just use my crock pot insert since it’s large the crock insulates really well, but you could use any glass jar or dish that you can cover).
- Allow the mixture to incubate. My preferred method of doing this is to put it in the oven with the oven barely on. To make sure that my oven was maintaining a temperature of about 100 degrees when I just barely clicked it on, I put my candy thermometer in a bowl of water on the rack beside my container or yogurt and just checked in periodically the first couple of times. Now that I’m confident, I just skip that step.
- Let it culture for 8-12 hours.
After that, you can eat it straight from the container, if you like. I prefer to strain mine so that it’s thicker and more solid. I save the whey that I strain off and substitute it for buttermilk, milk, yogurt, or water in all sorts of other recipes and even in smoothies (waste not, want not!). After I’ve strained it, I usually don’t love the texture of the yogurt as much (it’s beautifully smooth before I strain, but tossing it around straining it gives it a lumpy texture), so I usually stick mine in a blender and blend it up to make is smooth again. If it’s too thick to blend, I just add back as much whey as is necessary to get the texture I prefer. We like ours sweetened with honey (and sometimes stevia) and vanilla, so sometimes I go ahead and add those at this point. Otherwise, I just sweeten or doctor it on an as needed basis (don’t forget to set some unsweetened aside to use as a starter for future batches!). I also use the unsweetened yogurt as a substitute for sour cream, so sometimes I set aside some for that, if I know I’m going to want some.
*We use raw milk, since that’s generally what we have around. There are many discussions out there about heating the milk to a lower temperature in order to keep the enzymes and naturally occurring good bacteria intact. At some point, I may reduce the temperature that I heat mine to. For now, though, I know that I tend to use milk that’s a week old and I feel better about heating it to a higher temperature to make sure that the bad stuff has been killed before I begin the process of making yogurt.
**For my starter, I use a single container of store bought plain greek yogurt. You don’t have to use greek yogurt, it’s just my preference. I do try to look at labels and get one with more than one active culture and as few other ingredients as possible. Afterwards, I just set aside about a cup of my batch of yogurt to use as a starter again. Eventually, your starter will weaken since this is a less controlled environment that a big industrial process, but in the meantime, you’ll have turned a lot of milk into yogurt! 🙂 And, when that happens, you can just grab a single container at the store and get started again. Usually, we’re desperate enough to eat the starter before it ever gets weak enough to be a problem. 🙂
I’m no food pathogen expert, but our homemade yogurt has lasted in the fridge for 2+ weeks easily. I do like to label it with the date just so that I know how long it’s been in there, but I’ve never had a batch that’s been in there long enough that I’ve though it was “off” and needed to be tossed out.
You May Also Like

9 Comments
Mary
Thank you! I am so excited to try this! How much milk would you recommend using with the cup of starter? We eat a LOT of yogurt at our house and making our own would be WONDERFUL! Thank you! 🙂
LB
Hi Mary –
I’ve used up to a half gallon and had no problems at all. I hope you’re wildly successful! We love making our own yogurt!
Pingback:
Jude
Wow, very inspirational. I am definitely going to try this. Impressed!
LB
It really is pretty straightforward and simple! Let me know if you do and how it goes!
Katherine
I got a yogurt maker for Mother’s day…and was really good about making it for 6 wks or so, then summer camp got in the way. You have inspired me to get it out again! One question, the “whey” you strain out, is it a 1:1 sub for buttermilk…like for buttermilk pancakes?
LB
I’ve done the same thing over the summer with some kefir grains I was given. Summer just throws off the routine (such as it is)! I pulled my kefir grains back out of the fridge yesterday to get them going again. Yes, I do substitute the whey 1:1 for buttermilk. It’s thinner than traditional buttermilk, but that hasn’t bothered me in any of the recipes that I’ve used it in, since it does give you that nice “tangy” flavor that buttermilk brings to a recipe.
Pingback:
Pingback: